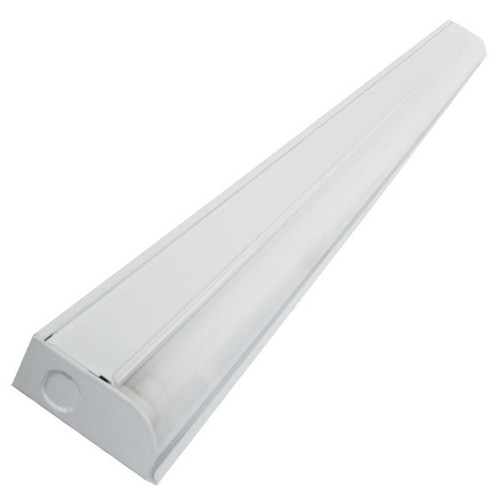
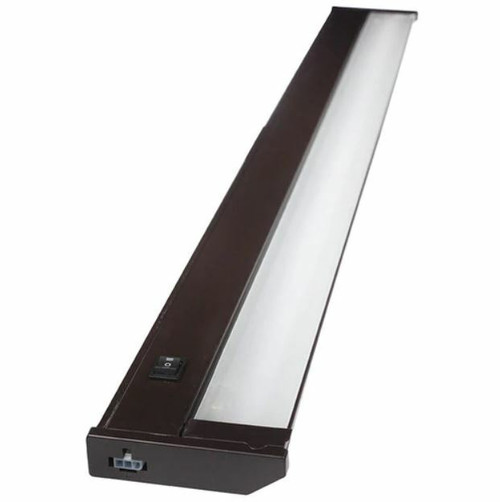
Tried and true fluorescent kitchen overhead lighting, now in a slim designer package, the CUFUN series of under cabinet flush mount light bar aims to please. Measuring just under 1" tall, these fluorescent light bars are capable being installed onto any cabinet and create discrete full volume lighting. Boasting multiple knockouts for easy hard wire installation, the CUFUN series makes installation incredibly streamlined. Protecting the T5 lamp is a ribbed plastic diffuser lens which can be taken out without the use of tools, allowing you to replace bulbs in seconds (after given time to cool). The CUFUN series uses an instant-on ballast which causes the fixture to illuminate the moment you switch the power on, no waiting. Included with this slim fluorescent under cabinet bar is the mounting hardware required to install the fixture and a matching size T5 tube pre-installed and rated at 4100K (soft white). Available in 12", 21", 34" and 46" sizes, we have the right size light bar for your next kitchen/task lighting project.
| Material | Metal Housing / Plastic Lens Diffuser |
| Voltage | 120V 60Hz |
| Socket Type | Miniature Bi-Pin |
| Bulb Type | F8 /F13 / F21/ F28 T5 Fluorescent |
| Power Rating | 13w / 18w / 21w / 26w Max |
| Color Temperature | Soft White 4100K |
| Connection Type | Direct Wire / Hard Wire Only |
| Dimensions | 12" / 21" / 34" / 46" X 2.5" X 1" |
| Certifications | UL Listed for Dry Locations Only (E243924) |
PLEASE READ THESE INSTRUCTIONS CAREFULLY AND SAVE THEM, AS YOU MAY NEED THEM AT A LATER DATE.
WARNING: Failure to install and wire fixture in accordance with the National Electrical Codes (NEC), all applicable Federal, State and Local electrical codes, as well as specific UL safety standards for the intended working environment (location/application), may cause serious personal injury, death and/or property damage. This product must be installed by a personal familiar with the construction and operation of the product and the hazards involved.
CAUTION: TURN OFF POWER FROM THE MAIN CIRCUIT BEFORE INSTALLING FIXTURE. Make sure fixture is grounded per National Electrical Codes (NEC).
Important Note: The safeguards and instructions appearing on this page are not meant to cover all possible conditions and situations that may occur. It my be understood that common sense, caution and care, are factors which cannot be built into any product. The person(s) installing, operating and responsible for the light fixture must execute these factors.
Warning: Risk of fire and electrical shock. Most dwellings built before 1985 have supply wires rated 60 degrees C. Consult a qualified electrician before installing.
If supply wires are located within 3 inches of the ballast, use wires rated at least 90 degrees C.
Tools required for installation:
To help prevent the possibility of electrical shock, the use of rubber sole shoes is recommended. Exercise care; use work gloves when handling the fixture to avoid cuts and abrasions.
Ballast Replacement Instructions:
TURN OFF POWER FROM THE MAIN CIRCUIT BEFORE INSTALLING FIXTURE.
WARNING: Failure to install and wire fixture in accordance with the National Electrical Codes (NEC), all applicable Federal, State and Local electrical codes, as well as specific UL safety standards for the intended working environment (location/application), may cause serious personal injury, death and/or property damage. This product must be installed by a personal familiar with the construction and operation of the product and the hazards involved.
CAUTION: TURN OFF POWER FROM THE MAIN CIRCUIT BEFORE INSTALLING FIXTURE. Make sure fixture is grounded per National Electrical Codes (NEC).
Important Note: The safeguards and instructions appearing on this page are not meant to cover all possible conditions and situations that may occur. It my be understood that common sense, caution and care, are factors which cannot be built into any product. The person(s) installing, operating and responsible for the light fixture must execute these factors.
Warning: Risk of fire and electrical shock. Most dwellings built before 1985 have supply wires rated 60 degrees C. Consult a qualified electrician before installing.
If supply wires are located within 3 inches of the ballast, use wires rated at least 90 degrees C.
Tools required for installation:
- Philips screwdriver
- Flat head screwdriver
- Pliers
- Hammer
- Electrical Tape and/or Wire Nuts
- Metal file
To help prevent the possibility of electrical shock, the use of rubber sole shoes is recommended. Exercise care; use work gloves when handling the fixture to avoid cuts and abrasions.
Ballast Replacement Instructions:
- Please read and follow all warnings in this instruction sheet
- Turn power OFF from the main circuit
- Remove cover
- Place new ballast next to the existing ballast to ensure that the mounting locations are in the same place.
- Remove the mounting hardware. Remove wire nuts that connect ballast to lamp holders by turning the wire nuts counter-clockwise
- Mount the new ballast utilizing the existing mounting hardware.
- Follow the wiring diagram and installation instructions on the new ballast and connect the lamp holders using existing wire and wire nuts. Place the wires in wire nut and turn them clockwise until tight and secure. Confirm all wires are connected according to wiring diagram
- Turn power on to operate the unit
TURN OFF POWER FROM THE MAIN CIRCUIT BEFORE INSTALLING FIXTURE.
- Remove the lenses carefully by pressing in at the bottom and pulling up and off.
- If bulbs are installed in sockets, remove them and set them aside carefully
- Disassemble fixture by pressing at the bottom of cover and pulling cover up and sliding out the notch from the base.
- Knock out the desired hole to be used to wire unit through. Use the hammer and flat head screwdriver to remove the knockout, making sure to file down any sharp edges. If you are going to use a connector (not included), screw connector to the metal base and bring the power wires through this connector.
- Position the fixture base on the location where the fixture is to be mounted. Mark the mounting location.
- If mounting directly into a stud using mounting hardware screws (provided), install screws through the base plate at the locations previously marked. Make sure that screw heads are positioned over the narrow end (top) of the keyhole slot, then tighten screws down until snug.
- Electrical Connections: connect green (or bare copper wire) to the green ground wire of the fixture (ground wire must be properly attached or unit may not function). Connect the white supply wire to the white fixture wire, cover them with a wire nut or twist together and cover well with electrical tape. Connect the black supply wire to the black fixture wire, cover them with a wire nut or twist together and cover well with electrical tape.
- Slide notch of the cover over base, making sure no wires are pinched between the plates. Push down and snap in metal cover onto base plate.
- Install lamps into lamp holder sockets. Slide lenses into fixture base.
- Turn power ON.
1 Review Hide Reviews Show Reviews
-
Lights are Very Bright
Lights are very nice installation is not bad. The wiring is tight for feed through from 1 fixture to the next. Careful planning and mounting makes it easier. I used #14. It just fits as the ballast takes up almost all the space in the housing. Remove the jacket and tuck the wires next to the ballast. At first it didn't look like they would fit, but they do. 2 screws hold the fixture up. Remove knock outs. Mark all holes with a pencil. Drill holes mount the housing. Install wiring. The ballast and lamp holder are separate from the housing. Makes easier install. I installed 4 light on 1 switch. And 2 on the other. The 34" fixture is 1 bulb.


